Wash the Car Best Build Order: What to Build First and Next
The Wash the Car build order that makes your car wash earn faster: foam sprayer, brush set and front jet first, dryer later, with More Income and Bigger Tips raising every payout.
Want your car wash to earn faster? Build the washing machines in each bay in a fixed order: foam sprayer, then the full brush set, then the front jet. A finished machine set washes on its own, and a bay that washes itself earns while you build the next thing. Leave the dryer until your cash is flowing, and split your money with the shared upgrade station's More Income and Bigger Tips, which raise what every wash pays.
Wash the Car's buildable equipment falls into the classes the creators themselves list — foam arches, brushes, water jets and dryers — and every bay you unlock ships empty, so you buy its equipment set piece by piece with in-game cash. That is why the order below is one you will repeat in every bay rather than buy once.
The build order inside a car bay
If you are new to placing buildings at all, the how to build a car wash page covers the basics. Once you can build, work through the washing machines like this:
- Foam sprayer. The sensible first purchase in a fresh bay — it covers the top of the vehicle before any brush turns.
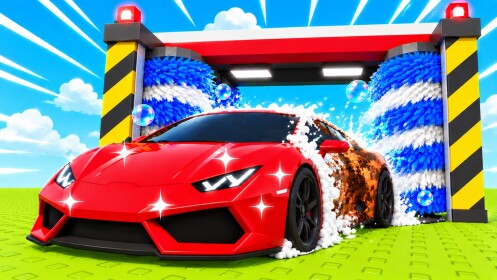
- Left, right and top brushes. Buy the whole set. A finished brush set is what lets the bay do the job alone, so partial brush coverage is the thing to avoid.
- Front jet. With the jet in place, the wash completes itself front to back — one player's bay was, in their words, automatic at this point.
Watch the purchases happen in order in the original video on YouTube.
The build menu also lists a tow rack, wooden crates, service barrels, a table and chairs, a boombox, bollards, a spotlight, a TV screen, a vending machine, plus a conveyor and a gold conveyor. None of the extras replace the washing machines above — treat them as decoration for once the bay already runs itself. The car wash building walkthrough covers what each installation cleans.
The dryer: skip it early, buy it once you are earning
In your first bays the dryer is a luxury — one player looked at it, decided against it, and kept washing. Later the same purchase flips in value: the dryer pays you. Once your bays are complete and payouts are steady, go back and add dryers; one later bay showed one priced at 18 million.
That timing is an observed ordering at certain cash levels rather than a stated game rule, but the direction is consistent: washing machines first, dryer once income can carry it.
Between builds: raise More Income and Bigger Tips
The upgrade station is shared across your whole lot rather than part of any one bay, and it offers sponge size, walk speed, More Income and Bigger Tips. Two habits matter here:
- Open each new zone with income upgrades, not machines. Players who reached the helipad and later zones bought income upgrades before machine builds, so every wash that followed funded the next purchase faster.
- Do not leave Bigger Tips for last. It multiplies what each wash pays. One player ignored it until late, raised it, and found earnings jumped substantially — late beats never, but earlier beats late.
Then there is the free part: newly arriving vehicles show clickable multiplier buttons above them. They do not auto-trigger, so press them for every arrival — one player who never noticed them simply missed the bonus income until they spotted the buttons. Since tips ride on top of wash payouts, the how to get tips page pairs well with this.
Every new zone needs its own machine set
Building is gated by escalating unlocks, each one handing you another empty place to kit out:
| Build gate | Shown cost or requirement |
|---|---|
| Second car-wash slot | 18 million |
| Third car place | free — unlock it manually; it ships with no machines |
| Helipad zone | 4 billion |
| Boat dock | about 6 quadrillion |
| Boat dock 2 | 100 QD |
| Dock 4 | 7.8 QN |
| Airport | after the docks |
These figures are as shown in build menus at those tiers, and a couple of builds carry extra gates: the helipad water spray required finishing a 4 billion point first, and the plane required finishing the current part.
Each zone also adds machines cars never needed. The helipad has a fan that washes a helicopter's underside, plus refuel and water additions. The boat dock needs its own light (10 quadrillion) and foam sprayer (14 QD) before boats wash properly. And keep expectations low for water sprayers: at the helipad they did not clean on their own and really only hit the top, while at the boat dock the water sprayed from below while the dirt sat on top. It was the dock's foam sprayer that finally let boats wash well — so in new zones too, foam and brushes come before anything else.
Once a zone's machine set is complete it behaves like the car bays: at a finished helipad, the side brushes washed a helicopter by themselves.
As payouts climb, spend in the back, not the front
Helicopters and planes pay billions while the front car bays pay pocket change, so past the helipad the smart spending shifts. Stop investing in the older front and pour cash into the newest, back zone — and wash whichever zone you are currently upgrading, because that is the one whose payouts fund the next build, while the finished front earns too slowly to matter.
One long-run player's rule of thumb is to build each place out to about four bays or docks — three bays in the car wash, four at the helipad, four at each dock — before the airport appears. That was their reading of the map rather than a game-stated target, but it matches how the zones scale. For what each vehicle actually pays at each stage, see the cash guide page.
The loop stays the same from your first bay to the airport: finish the washing machines in the zone you are growing, keep More Income and Bigger Tips climbing, click every multiplier above incoming vehicles, and let the finished bays wash alone while you save for the next build. If you are just starting out, the progression guide covers both the first bay and the long game from there.
Related Guides
How to Build a Car Wash
Equip an empty bay piece by piece: what each installation cleans, purchase order, and how machines automate the wash.
Progression Guide
What to work toward at every stage: extra bays, the helipad, airport and boat docks, and income upgrades.
Cash Guide: Pay and Spending
See how each wash pays automatically, how tips and multipliers stack on top, and what your cash buys.